It’s always important to learn about the characteristics of the wood you’re about to be refinishing before beginning any new project. Refinishing furniture requires patience, attention to detail, and some good ole fashion elbow grease. But I know you can do it! And trust me it really is extremely rewarding when its done.
About Maple
Maple wood has a very strong surface making it perfect for floor construction. However, maple doesn’t do well in humidity and wouldn’t be the best choice for flooring in hot states. Its strong surface makes it perfect for the construction of bowling pins, pool cues, baseball bats, wood trim and musical instruments.
It’s a huge source of pollen and it is critical to the survival of the honeybee, but its pretty resistant to other pests and insects. The tree is a light brown-gray color when its soft, and a more dark gray when its hard. It’s not really politically correct anymore to use maple in furniture construction. It’s estimated that within twenty-five years the present supply of maple will be gone. (Source) because maple trees are as slow to grow as walnut. Refinishing maple furniture is more environmentally friendly than buying new maple. The timber is hard so it can hold maple stain extremely well. However, many have reported the wood prone to scratches due to its tightly closed grain.
Sanding Maple Furniture
Sanding maple furniture can be difficult because it has minimal grain and a hard surface. An orbital sander will really come in handy here and will save you a lot of time. Try using a 3/32 inch orbit to start and a 3/32 later for finer sanding later. Any grit sandpaper between 100-170 should suffice for this job. You may need to wrap your sandpaper around a brick or hard object and finish up with some hand sanding. Remember to sand maple slow in order to help remove some of its naturally tough swirls. Some like to use card scrappers like those sold at Lee Vally® to help remove some of the swirls. I always like to finish with sandpaper before I begin refinishing maple furniture though. Make sure to always sand with the grain or you risk damaging the maple.
Cleaning Maple Before Staining

Vacuum the sawdust off of the furniture thoroughly making sure to get every spot. It’s a good idea to vacuum the floors and anything else nearby to prepare the perfect refinishing environment. Go grab some clean shoes and clothes while you’re at it too. It’s best to do this job outside, but if you must do it indoors lay down a tarp or some newspapers before you begin. Open some windows and get the air flowing too.
Staining Maple
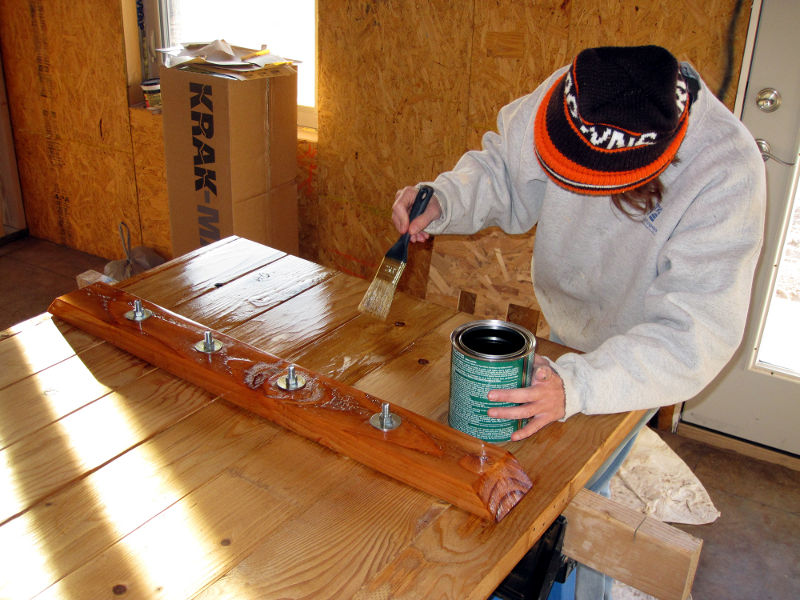
In the early days, maple was usually finished with a wax, or varnish. Now they are commonly finished with oil stains which just aren’t the same. Oil stains can be easily spread into the pores and cause widespread blotchiness. Spray dyes and enamels are the best way to stain maple, but the color options aren’t as plentiful. Spraying dye or enamel will keep the color from spilling into the pores and give a much more even coat. However, if you don’t have a spray setup you should probably look into gel stains. It’s worth it to invest in a spray setup though because a truly excellent maple stain must be either a dye or an enamel.
Before beginning to stain, some recommend applying Zinsser Sanding Sealer over the wood. I’ve never used this product so I can’t comment on it, but I’ve heard helps the color apply evenly. Shellac sealers will help spread out the color too. Not all maple wood is the same color, so you will need to plan carefully before beginning. Most maple is too dark to for any light colored maple stain to have a positive effect. You could try bleaching, but it probably won’t work too well. Lighter colored maple can easily be refinished to any mahogany, cherry, or brown color successfully. Any type of a red maple stain will look great and apply easily to maple furniture.
 Finishing Touches

After you’ve successfully applied a maple dye or enamel to your furniture you may want to finish up with some polyurethane semi gloss. The type of polyurethane semi-glass you use will help determine the final color of the stain. The two most popular types of polyurethane are oil-based and latex. Oil-based polyurethanes are smelly, but they generally dry in about 7-9 hours. They leave a transparent amber look to the furniture and hold their color well. Latex polyurethane is generally water based and has a less intense smell. It is much quicker to dry and should leave more of a heavy cloudy white color on the furniture. It will finish with a lighter tone than oil and it’s more environmentally friendly. Please see our recent post on Water Based vs. Oil Based Polyurethane for more information.
As with any painting or staining project you may get frustrated when things aren’t working out as planned. We recommend testing these procedures on spare blocks of wood before attempting any technique seen on this website. Refinishing maple furniture is a little more difficult than other types of wood. Proper planning and research are essential to not only picking the correct maple stain, but to finish the project correctly and successfully. If you have any questions please feel free to post below. Thanks!

This article is a couple years old, so I hope someone is still watching it. I recently obtained a mid century library card catalog cabinet. I’m pretty sure it is maple, as the wood is soo hard and almost flawless. No scrapes or dings that you normally find with Oak. The grain is visible, but there seems to be an opaque lacquer over the drawer fronts and cabinet. I don’t like the finish, so I was thinking of using some type paint remover, and if I’m successful, a light sanding, oiling and then just beeswax over the entire thing. Is this feasible with maple? What type of paint remover would you recommend?
I’ve got a dresser and would like to do the same as Karen in the the comment above. The dresser still has the original mirror, which has some crazing/crackles in the reflective finish.
Any tips or hints would be appreciated.