Refinishing wood furniture is not as simple as you may think. Staining wood takes a little time and elbow grease, but the finished product will be well worth it. Check out my earlier article on for a detailed explanation of preparation when refinishing wood furniture. before you begin with the staining an old bookshelf, table, desk, etc. Once the existing finish is completely stripped you can follow the wood finishing techniques below to restore any wood of your choosing.
Keep in mind that some wood like birch, maple, cherry and pine can be extremely hard to stain correctly. If you’re not sure what type of wood you will be working with its best to start with a sample piece or corner. If the stain you choose appears uneven or darker in some places, it’s safe to say you are working with one of the types of wood mentioned above.
Make sure to repair any damages to the furniture before you begin applying a sealer or conditioner. If there are any dents, dings, cracks, loose corners, burns make sure to take care of them first. They will stick out like a sore thumb if you begin the process before these are fixed.
Always use a good wood sealer or conditioner to fill any cracks or dents. Make sure that the sealer is compatible with the final finish. Let the sealer or conditioner dry for about 15 min before beginning of the stain process. Test out different strengths of sealer on your sample wood piece to determine the correct amount for your furniture. Also make sure to wear gloves and old cloths, staining wood can get messy.
Most stains are oil-based and can be harmful if you are working in a poorly-ventilated space. To find a wide array of colors, and avoid the fumes, you can use a water-based stain product. Always make sure to stir the stain to get a more even color on the furniture. When you’re conditioner or sealer is dry, your stain is nice and mixed and your area is safely ventilated, you’re finally ready to apply the stain. Go slow because once you begin there is no turning back.
Wood finishing techniques to help when staining wood
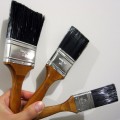
-Use a sponge, brush, rag or something similar to apply the begin staining wood. Depending on the color you hope to achieve you will need to decide how much stain to use.
-For a lighter coat, wipe the stain off of the furniture (with the grain) almost as soon as you put it on. If you’re looking for a darker color just leave the stain on for about 4-8 min. Make sure to wipe, not blot, when removing excess stain for the best results.
-Pay close attention to detail and finish each area completely before moving onto the next. This will help get everything perfect the first time so you won’t have to risk going back.


I have a desk that Im wanting to sand, restain and varnish. When sanding – Do I have to take it all the way to raw wood or is a little color (lighter than what Im staining) okay? Thanks.